Let's Get Started!!!
First cut all the fabric out...obviously.
Pin sides to front, right sides facing. serge or sew a 3/8" seam allowance stopping before end leaving a 3/8 gap at bottom. Copy all these same steps for lining as well.
 |
| your bottom, sides, and front will need to make a mitered corner so be sure to stop early |
Next pin the bottom, right sides facing, to the top panel.
 |
| Be sure not to catch the side panels while sewing on the bottom, I folded mine over to avoid it. |
If you're not surging, I suggest going over the raw edge with a zigzag to avoid fraying.
Remember little hands are hard on things, and you want to be able to chuck this thing in the wash when he spills a cup of milk on it at the dinner table cause he's not paying attention and you've told him a million times...ugh, I digress. :)
Unfold your four pieces and add the last panel, the back. With right sides pinned, sew. Don't forget about that mitered corner allowance!
Your bag when laid flat should look like a really fat 'T'.
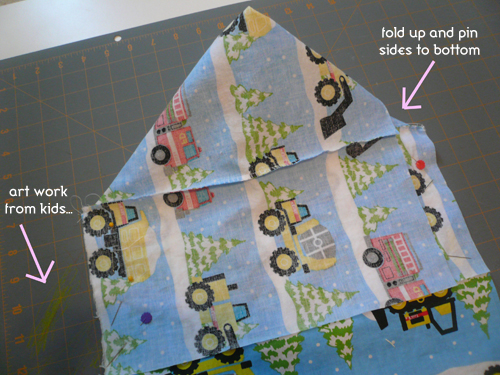
Now it's time to make this thing look like a bag! Fold it over so the end of the side panel matches up with the side of the bottom panel.
Do this with the other side, and you will see it makes a sort of "house shape".
Don't forget to copy all these steps with your lining.
After that, match up the long sides of the side panels to the sides of the back panel, making the shape of the bag, right sides together pin and sew.
Your bag should look like this so far...Here is what my lining looked like all sewed together with the extra heavy duty interfacing. I wanted this double as a bin when it's not being carried around, this heavy duty interfacing is great, it stand up all on it's own, great for "clean up time"!
Open your main fabric bag and press all seams
Cut {2} pieces belting material or folded felt for handles. 20" each.
Pin handles onto lining and/or interfacing and tack down. I used a 3 in one straight stitch, it's not going anywhere! The kids could whip this puppy around all day and that handle is not coming off! :)
Since this is a {very late} birthday gift, I went ahead and appliqued his initial onto the main fabric before I pinned and top stitched.
Then, form your hem by folding down your fabric, lining up the seams as well as you can, and pinning all the way around the bag. When you top stitch you will also catch those handles again so they REALLY aren't budging!
Play around a bit, too. Try adding two or three top stitches to give it a more textured look. Or if this is for a girl, maybe try out one of your decorative stitches!? Have fun!
I'm hoping he'll have as much fun loading this bag up as I had making it! It was very easy and I think it turned out wonderful!
Have fun!! Feel free to leave questions in the comments!


No comments:
Post a Comment